
Crusource Docs
Teamspace & PermissionsUpdated: 2026-11-06
Overview: Invite colleagues to your Crusource CRM organization, assign them to functional teams, and manage seat licenses.
Inviting Team Members & Managing Seats
Crusource CRM's Teamspace module centralizes user onboarding, seat allocation, and collaborative team structures for your revenue organization.
Before You Begin (Prerequisites)#
- Administrator or Team Manager role with user invitation privileges.
- Available active user seats on your subscription plan.
Step 1: Open the Teamspace Management Screen#
- In the left navigation sidebar, scroll down to the Administration section.
- Click on Teamspace.
- Select the Members tab.
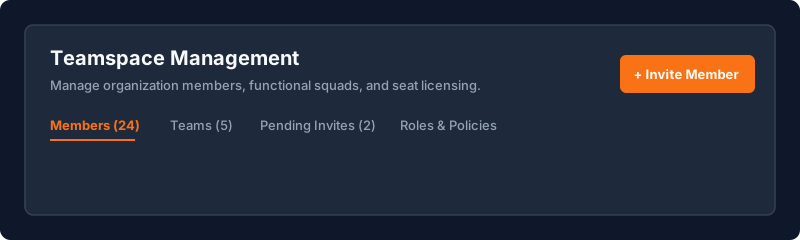
Click to enlarge screenshot
Step 2: Send a User Invitation#
- Click the orange + Invite Member button in the top-right corner.
- In the invitation modal, enter:
- Work Email: The user's corporate email address.
- Role: Choose between
Administrator,Sales Manager,Sales Representative, orRead-Only Auditor. - Assigned Team: (Optional) Assign them directly to an existing team (e.g., North America Outbound or Enterprise Accounts).
- Click Send Invitation.
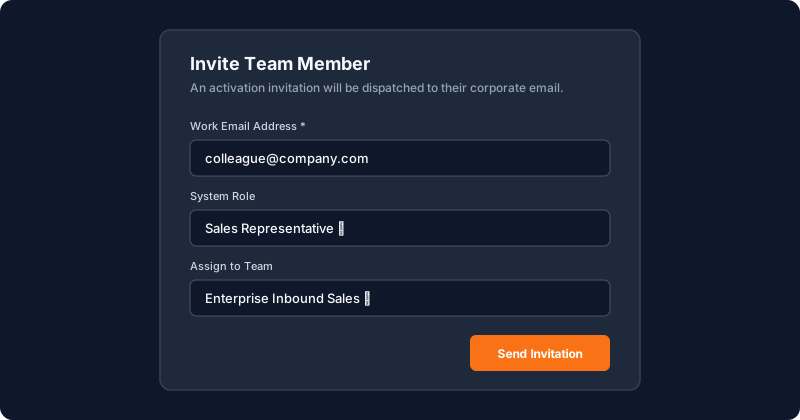
Click to enlarge screenshot
[!NOTE] The invitation link remains active for 7 days. If the invitee does not complete registration within that window, you can click Resend Invite from the Pending Invites tab.
Step 3: Organizing Users into Functional Teams#
- Switch to the Teams tab inside Teamspace.
- Click Create Team.
- Provide a team name (e.g., EMEA Enterprise Sales) and select a Team Lead.
- Check off the individual members belonging to this team.
- Click Create Team.
Step 4: Deactivating a Member or Transferring Ownership#
When an employee changes roles or leaves the organization:
- Find their row in the Members list.
- Click the three-dot action menu (
...) and select Deactivate Member. - In the reassignment prompt, select a colleague who will inherit their open leads, active deals, and upcoming tasks.
- Click Confirm & Transfer Records.
Troubleshooting & FAQs#
What if I get an "Insufficient Seats Available" error?#
Your organization has reached the maximum seat count allowed by your subscription plan. A Workspace Administrator can add additional seats under Settings > Billing & Subscriptions.
Need Instant Assistance?
Have a question about Inviting Team Members & Managing Seats?
Ask Loop AI for step-by-step guidance, permission requirements, or troubleshooting tips directly within the docs.
On this page
